AT ANY TIME CLICK OUR LOGO TO RETURN TO THIS HOME PAGE
BEFORE ORDERING PLEASE AQUAINT YOURSELF WITH OUR TERMS & CONDITIONS OF SALE
FOR STANDARD 0.6MM &CONSTRUCTIONAL VENEER SHEETS PLEASE VISIT OUR SISTER SITE AThttp://www.woodveneer4u.co.uk/
YOU CAN NOW PURCHASE A5 SIZE SHEETS OF THE SPECIES OR COLOUR OF YOUR CHOICE BY GOING TO
Although the representation of colours can be problematic due to variations in monitor setup, resolution & colour balance, UNLESS OTHERWISE STATED ALL VENEERS ARE 0.6mm THICK
REGARDING STRINGING & BANDINGS
'BUY NOW' PAYMENTS RECEIVED FOR BANDS & LINES MONDAY TO SATURDAY INCLUSIVE, BEFORE 7AM, WILL NORMALLY BE DISPATCHED THE SAME DAY IF AVAILABLE.
EACH INDIVIDUAL BANDING/LINE/STRINGING IS DISPATCHED CUT TO 3 x 325mm LENGTHS NB All carriage rates and button prices quoted on this site are for delivery within the UK mainland only.
TO OBTAIN THE CHEAPEST SHIPPING RATES FOR MULTIPLE PURCHASES OF DIFFERENT ITEMS, OR FOR GOODS THAT DO NOT HAVE A BUY NOW BUTTON GENERAL ENQUIRIES
Please click
HERE
and state your requirements in the comments box on our contact form.
There are many ways of enhancing your work using Inlay Bandings, Boxwood , Ebony or black lines, marquetry inlays or marquetry lay on panels.
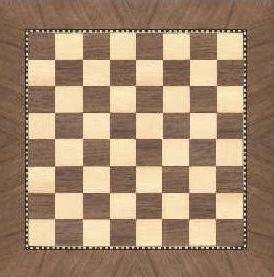
The above panel shows what can be achieved using walnut & sycamore with a boarder of inlay banding and a book-matched surround of Birch Masur.
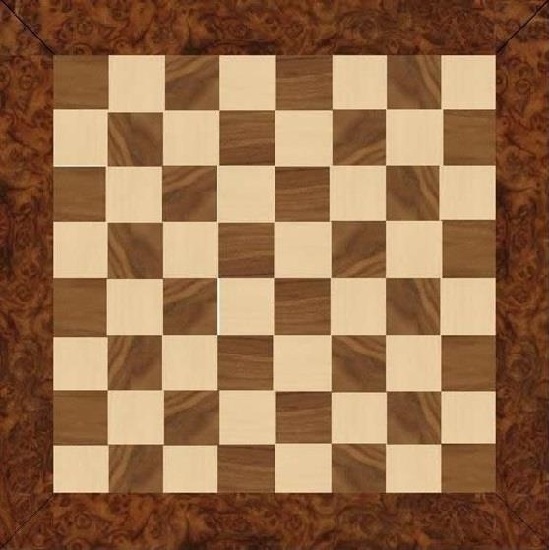
The panel above shows what can be achieved using walnut & sycamore with a book-matched surround of Walnut Burr.
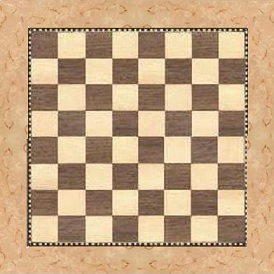
Or to maintain a plain Walnut & Sycamore theme throughout the above panel shows what can be achieved using a banding boarder to the playing area. © C. Pascoe MCB Supplies
|